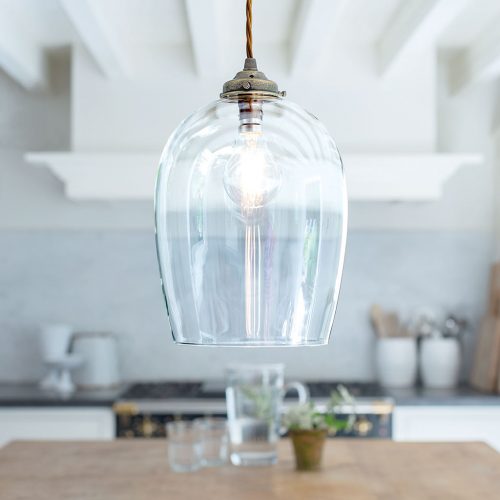
Pendant lights are sometimes described as the ‘jewellery’ of a room, which is true in that they can be a beautiful way to tie together your look. Whether for a lofty barn roof, a dark hallway, your kitchen island or a bedroom you want to make a little cosier, there are many ways you can bring your room together with style and substance using pendants. Here is our simple introduction on how to fit a pendant light…
![]()
Installation should always be carried out by a qualified electrician or a competent person in accordance with current electrical regulation. These are our Must Do’s…
- Please note that all our lights require earthing and must be installed in accordance with the latest edition of British Standard 7671.
- The electricity supply should always be isolated at its source (fuse box) before attempting any installation or maintenance.
- Please do not fit bulbs exceeding the maximum allowable wattage as shown on the label adjacent to the bulb holder.
- If the external flexible cable or cord is damaged, it should be replaced exclusively by Jim Lawrence or a similar qualified person in order to avoid a hazard.
![]()
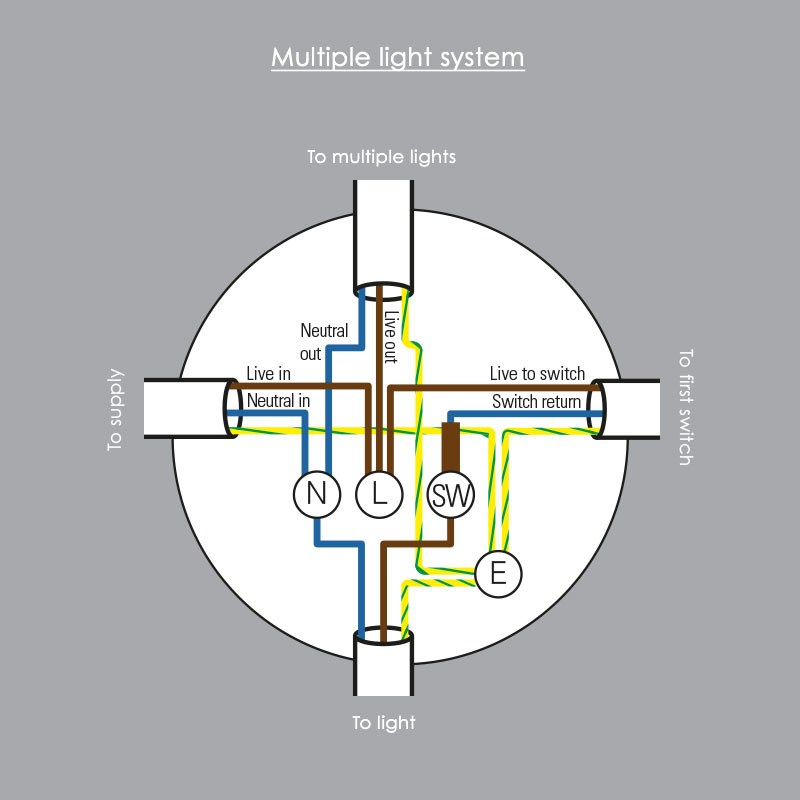
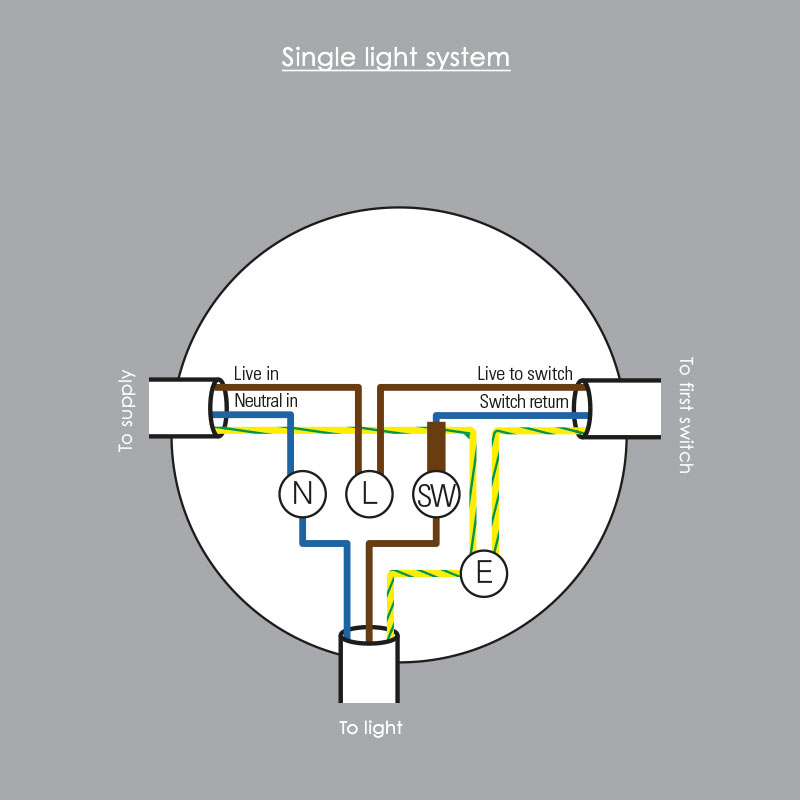
If the wiring in your house predates the British standards regulation in 2004 to harmonise wiring colours, then the colour of your wires may be different to the illustration.
![]()
![]()
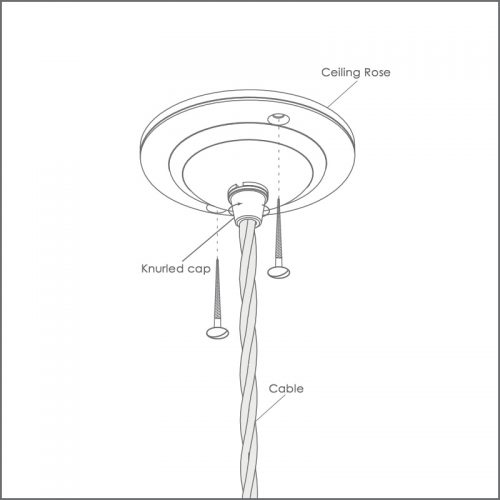
Position the rose to the ceiling where you would like to install your light. Ensure you have a strong fixing point – a ceiling joist or batten is ideal. Mark and drill the holes for the fixing screws taking care not to damage any electrical cables. In many older houses this point can take some time to prepare. Next, trim the cable of your pendant to suit your ceiling height and room proportions.
![]()
Before connecting the light to your supply wire, ensure the mains electricity is turned off. We recommend you use the appropriate sealed connector block within your ceiling cavity to connect your light to the supply wire. Ensure the cables are fully inserted into the connector block and connect the wires in accordance with the wiring diagram.
![]()
Simply screw the ceiling rose to the ceiling using the screws provided.
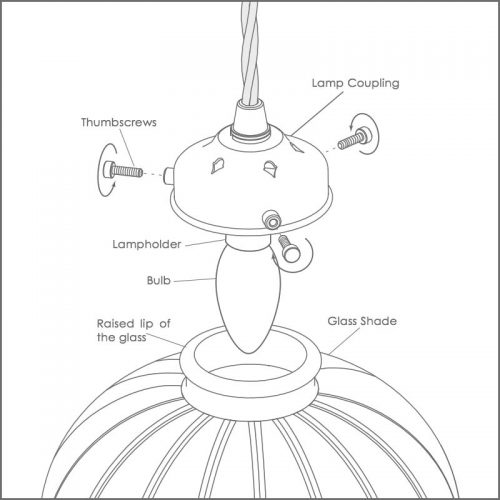
Fit a light bulb, then ensure the raised lip of the glass is pushed up above the line of the thumbscrews. Begin to tighten the thumbscrews alternating from screw to screw so that they are all wound in at an even length. Once all screws have made good contact with the glass the raised lip will prevent the glass from falling out. Ensure the screws are finger tight being careful not over tighten as this may damage the glass. If a chain is supplied with your light it MUST be used at all times.
This information is intended as a guide only. Please see the latest IEE Wiring Regulations for full details. Jim Lawrence takes no responsibility for incorrectly installed lights & recommends that all lights should be installed by a qualified electrician.
![]()
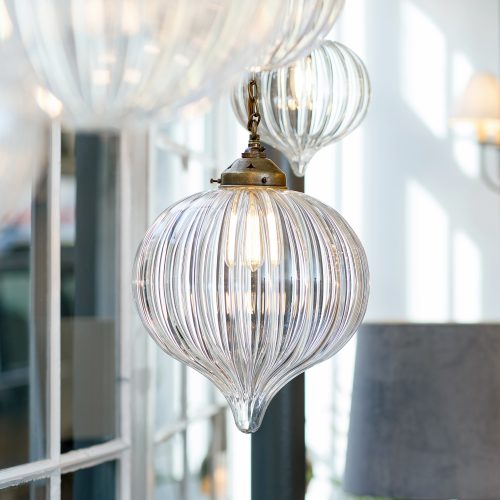
If you are hanging your pendants from a central point in your room, you need to consider the height of your ceiling as a first step. Many old houses have low ceilings and may require flush or semi-flush lights so you are not constantly ducking or hitting your head. Always check the maximum height of the light that you can accommodate before choosing your lights and check our product information which gives the measurements of all our lights.
We recommend lights in sitting rooms, bedrooms and hallways should be hung at least 2m (7ft) above floor level to give adequate clearance, but it is your room so you can hang them at whatever height you feel comfortable with. All our pendant lights come with either 50cm, or 1m of cable and chain that can be shortened. Another point to consider is that a light will look larger the lower it hangs and smaller if your hang it higher.
![]()
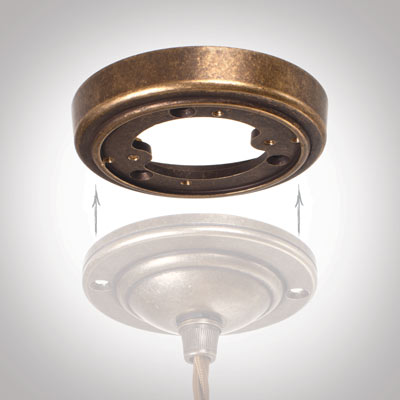
If you are unable to create enough cavity space for your wiring when using the ceiling rose supplied with your pendant, we can offer a retrofit ceiling rose with more capacity. Once you have an appropriate ceiling rose, simply secure it over the existing junction box. You can choose from our variety of ceiling roses here.
Wiring in period homes can be a tricky business which is why our design team have come up with this brilliantly versatile, neat little pattress to give your ceiling rose or wall light back plate extra depth. The pattress screws onto your existing Jim Lawrence Georgian ceiling rose to give it extra space to house the external wiring. For a pendant fitting, choose our Georgian Lighting Pattress.
![]()
Handcrafted stylish switches and sockets are the perfect finishing touch to any period or contemporary home. Our range of colourways and designs allow you to think creatively so you can highlight your wiring accessories instead of hiding them. When decorating a room it is sometimes easy to miss the little extras that can add the design flare your room was missing. When we’ve got hundreds of hand finished switches and sockets to choose from, it can be hard to pick which combination is right for you.

![]()
Still have any questions? You can find further information about all of our products in the Knowledge Base. View all of our pendant lighting here. Don’t forget to tag us in your Jim Lawrence interior updates, we love seeing your products in our new homes! You can find us @JimLawrenceMade on Instagram, and follow us on Facebook, Twitter and Pinterest.


Leave a Comment